6. Loading Your Product List
Currently your
<Product>is completely hardcoded and although it may seem quite portable where you can place it just about anywhere, and may create many instances of it, that is where the functionality ends. That<Product>will currently always have the exact same images and text. This section will take you through the process of making the content of your components dynamic and allow them to be passed in as variables!Review your existing
<Product>and have a look at the data fields that are present:- Product Image URL:
<div className='image'>
  <img src='images/products/image-aqua.png' />
</div>
- Product Title:
<div className='description'>
  <a>YOUR PRODUCT NAME</a>
  ...
</div>
- Product Description:
<div className='description'>
  ...
  <p>NEW FANCY PRODUCT OF YOUR OWN</p>
</div>
- Submitted Image URL:
<div className='extra'>
  <span>Submitted by:</span>
  <img className='ui avatar image' src='images/avatars/liz.png' />
</div>
Therefore a minimal representation of the data fields that are required for a
<Product>at this time are:product = { title: 'YOUR PRODUCT NAME', description: 'YOUR PRODUCT DESCRIPTINON.', submitterAvatarUrl: 'images/avatars/adam.jpg', productImageUrl: 'images/products/image-aqua.png', }
Open up the file
seed.jsand have a look around. Observe the definition of the array, or list, of products.Note there are 2 additional fields we did not previously define,
idandvotes, which we will see in action shortly.const products = [ { id: 1, title: 'Digi-Collectibles', description: 'The rarest digital collectibles.', votes: generateVoteCount(), submitterAvatarUrl: 'images/avatars/adam.jpg', productImageUrl: 'images/products/image-aqua.png', }, ... ]
This file defines a list of components that are to populate, or seed, the application when it initially renders. This will take a few steps, first you will need to update your
<Product>component to allow data for it’s fields to be passed in.
Making your <Product> dynamic and data-driven
Note
In order to do this we must introduce another ReactJS concept, that is Props.
Components are allowed to accpet data passed to them from their parents meaning the components that contain them. In your case the parent
is the <ProductRegistry> and it may have many child <Product> s. Therefore the <Product> components may accept data passed to them
by the <ProductRegistry>, and it is this data, passed from parent to child, that is referred to as props. Essentially the input parameters
that a component may accept are referred to as props.
Also this is a special keyword in JavaScript. For the time being we can assume his will be bound to the React component class.
Therefore this.props inside the component is accessing the props attribute on the component class.
Time to update your
<Product>component to accept some props!- Update Product Image URL:
<div className='image'>
  <img src='images/products/image-aqua.png' />
</div>
to >>
<div className='image'>
  <img src={this.props.productImageUrl} />
</div>
- Product Title:
<div className='description'>
  <a>YOUR PRODUCT NAME</a>
  ...
</div>
to >>
<div className='description'>
  <a>{this.props.title}</a>
  ...
</div>
- Product Description:
<div className='description'>
  ...
  <p>NEW FANCY PRODUCT OF YOUR OWN</p>
</div>
to >>
<div className='description'>
  ...
  <p>{this.props.description}</p>
</div>
- Submitted Image URL:
<div className='extra'>
  <span>Submitted by:</span>
  <img className='ui avatar image' src='images/avatars/liz.png' />
</div>
to >>
<div className='extra'>
  <span>Submitted by:</span>
  <img className='ui avatar image' src={this.props.submitterAvatarUrl} />
</div>
The resulting component should look like the following:
class Product extends React.Component {
  render() {
    return (
      <div className='item'>
        <div className='image'>
          <img src={this.props.productImageUrl} />
        </div>
        <div className='middle aligned content'>
          <div className='description'>
            <a>{this.props.title}</a>
            <p>{this.props.description}</p>
          </div>
          <div className='extra'>
            <span>Submitted by:</span>
            <img className='ui avatar image' src={this.props.submitterAvatarUrl} />
          </div>
        </div>
      </div>
    );
  }
}
This may look odd at first, seeing JavaScript directly inline with html, and that is in fact the beauty of JSX! The
{}braces identify that what is within them is a JavaScript expression. Therefore the props object of the<Product>component(remember just a JavaScript class).You will notice immediately that the rendered
<Product>is currently empty as there are no props being passed in to the component now to every data field is in fact empty. Let’s fix that and get your hands on some data.
Understanding seed.js and the window
Take a look back at the
seed.jsfile that should be open at this time, if it is not do open it now. This is where our data is going to come from!Let’s walk through this file one step at a time …
Note
JavaScript exposes a top level object accessible with the
windowkeyword which represents the browser window. This object contains many functions and properties about the given browser session and also allows you as a developer to bind data to the window that may be globally accessible.Let’s have a look at this
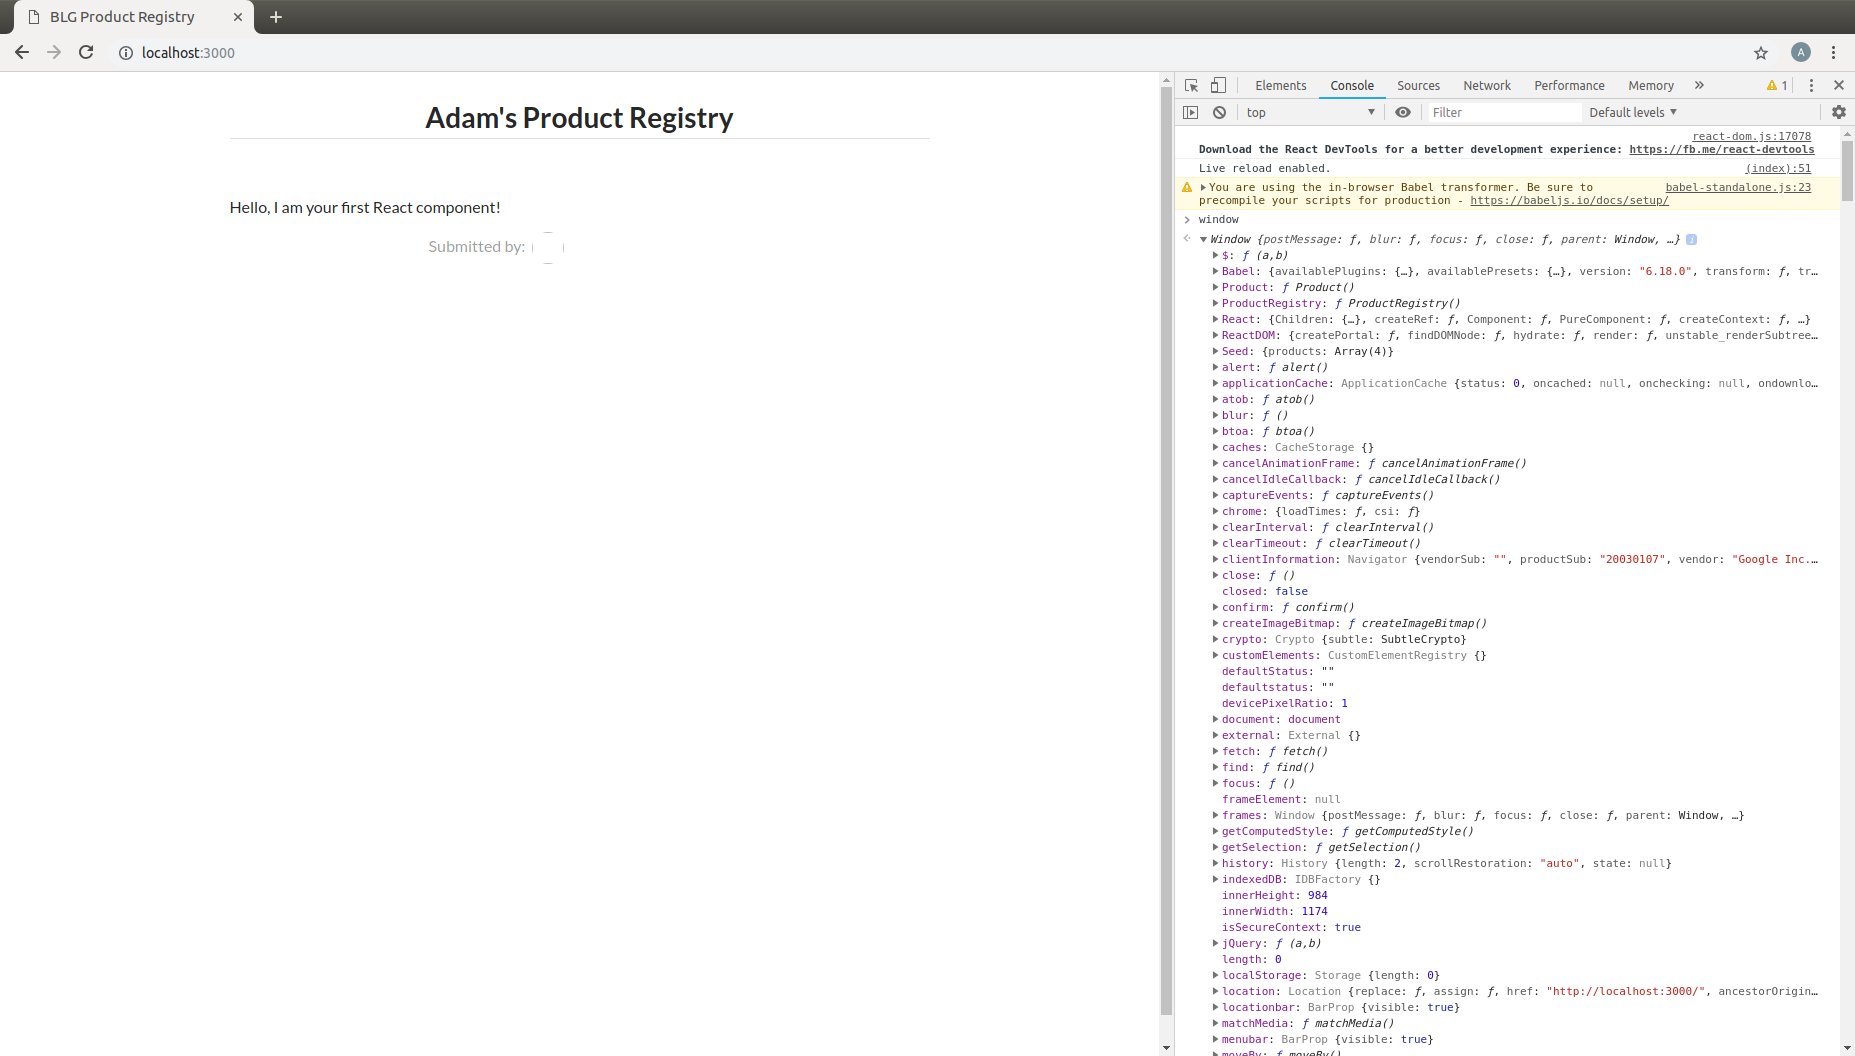
windowobject directly in the browser to see what it is all about.- Right-click in your browser and in the dropdown menu select inspect.
- Within the console type
windowand hit enter. - You will see a reference to the global
windowobject, expand this and have a look around. This is the top level object that JavaScript natively exposes.
The first line of
seed.jsis in fact accessing thiswindowobject and adding an attribute to it:Seed.window.Seed = (function () {...});
This attribute is set to a
function()and this function returns an object:{ products: products }. Resulting in:window.Seed = { products: products }Where
productsis your array of product data fields:const products = [ { id: 1, title: 'Digi-Collectibles', description: 'The rarest digital collectibles.', votes: generateVoteCount(), submitterAvatarUrl: 'images/avatars/adam.jpg', productImageUrl: 'images/products/image-aqua.png', }, ... ]
Have a look at this attribute back in the browser.
In the browser console type
window.Seedand you will see the result!Yes, all of your data has been loaded and is availble globally attached to the
windowobject.In fact every
windowattribute is accessible without thewindowkeyword as they are added to the global scope of the application. Therefore this object may simply be accessed globally via justSeed.> window.Seed > {products: Array(4)} > Seed > {products: Array(4)}
Loading a product from the Seed
Now it is time to utilize this seed data to populate your
<Product>Within the
<ProductRegistry>component load the first product of the Seed data into a local variable. Remember it is the parent that must pass the data to the child,<Product>, as props.class ProductRegistry extends React.Component { render() { const product = Seed.products[0]; return ( <div className='ui unstackable items'> Hello, I am your first React component! <Product /> </div> ); } }Pass the seed data to the
<Product>component as props:<Product title={product.title} description={product.description} submitterAvatarUrl={product.submitterAvatarUrl} productImageUrl={product.productImageUrl} />
You can also get rid of the “Hello…” line that is currently in the
<ProductRegistry>resulting with the following component:class ProductRegistry extends React.Component { render() { const product = Seed.products[0]; return ( <div className='ui unstackable items'> <Product title={product.title} description={product.description} submitterAvatarUrl={product.submitterAvatarUrl} productImageUrl={product.productImageUrl} /> </div> ); } }You should see the data from the first product in the
seed.jsfile rendered!
