3.0 Virtual Machine Setup
A customized virtual machine has been provided for all students that is fully configured.
Important
Virtualization must be enabled! If not by default, this will need to be updated in the computer’s BIOS.
1. Please download the virtual machine(vm) by clicking here
- The download will begin immediately or you may need to simply confirm to
Download Anywaydepending on your browser. Note the file is quite large ~2GB so it will take a few minutes to complete.- By default the file will be named
blg-starter-vm.ovaand will be saved within yourDownloadsfolder.
2. Install VirtualBox-5.2 for your respective operating system, select the correct package for Mac, Windows and Linux distributions below
3. Once downloaded double-click on the package to open it and follow the simple steps to complete the installation
4. Once installed open VirtualBox
- For Mac users VirtualBox will be located within the Applications folder and may be opened by clicking on the icon
- Otherwise you may search for
VirtualBoxon linux or Windows machines to locate the installed application
5. Import the downloaded vm
- Within the VirtualBox application click on
Filein the top left corner- In the dropdown menu click “Import Appliance…”, this will open a dialog window
- In the dialog window, click the file icon beside the bottom text field to search for the location the vm was downloaded to, it will be named
blg-starter-vm.ovaby default and will be located in yourDownloadsfolder, click on the vm to select it- Click the
Importbutton in the bottom bar, this will take a few minutes- Once completed a new VM will be present within VirtualBox that is currently stopped with the name
blg-starter-vm
6. Start the vm!
- Click on the new vm and then click the
Startbutton- In the dropdown click
Normal Start- This will take a few minutes, your vm is starting!
- Note ONLY if the VM fails to start
Note
It is most likely due to virtualization not being enabled on your machine, this will need to be accomplished in the BIOS of your machine. The process to boot into BIOS is highly dependent on your specific computer and instructions will need to be sourced online. In many cases restarting the computer and holding the esc button may do so.
- You will be prompted with the dialog below, simply ensure
*Ubuntuis highlighted and hit theenterkey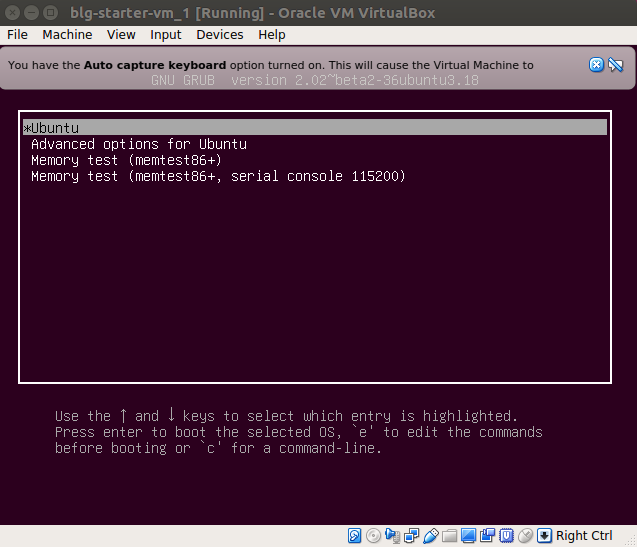
7. Finally you will have a brand new Ubuntu 16.04 virtual machine up and running with all the required dependecies
Well done, you are all set!
8. Stop the vm
- Prior to the beginning of the course you may wish to stop the vm
- Within VirtualBox right-click on the vm that is running
- In the dropdown menu click “Stop”, this will stop your vm which you can easily start back up when the course begins by following step 6 above